
Helpful Tips
Helpful Tips for November
Applying Filters in Different Tabs
Introduction:
Filters help refine search results by removing items that do not meet specified criteria. They improve accuracy, save time, and make it easier to locate needed information, especially when searching for active or discontinued medications in the Medication tab or reviewing a client’s most recent Cost Plan.
Applying Filters in the Medication Tab
If a client has an extensive medication list, applying filters allows you to quickly isolate only the active medications and streamline the review process. There are two ways to locate the active medications in the client record.
A. Using the Filters
- Log in to iConnect using your assigned role. Click Go.
- Utilize the Quick Search feature to locate the Consumers record. Click Go.
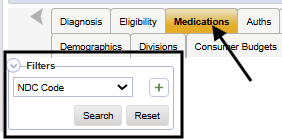
- Click on the Medications Tab.
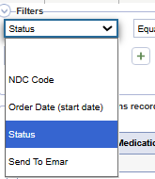
- Navigate to the Filters.
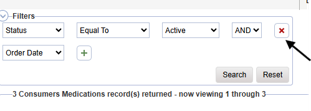
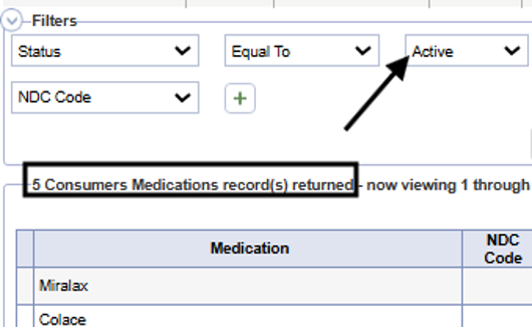
- In the dropdown menu, choose Status
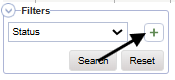
- Click the green plus sign (+) to add a search criteria
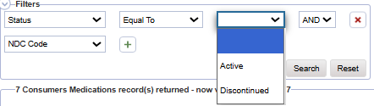
- Confirm the middle column is set to "Equal To".
- Using the down arrow, select Active to view only current medications.
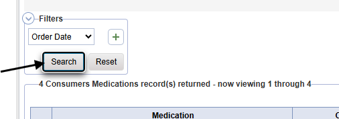
- Click Search to view the results based on the filters that you have applied.
- If wanting to view without filters, follow the steps below:
- Click on the red (X)
- Click Search to review the results without the filter.


B. Using the Headings
- Log in to iConnect using your assigned role. Click Go
- Utilize the Quick Search feature to locate the client's record. Click Go
- Click on the Medications tab.
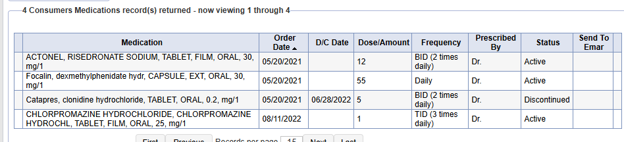
- The list view grid will display with the client's medications.
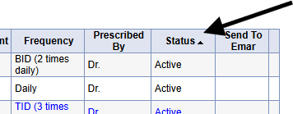
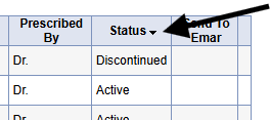
- Locate the header "Status". Click the box to change the sort order of the medications alphabetically. The order will be indicated by the arrow.


Applying Filters in the Plans Tab
If a client has been on the waiver for many years, applying filters or sorting the headings in the Plans tab allows you to quickly identify the needed cost plan. There are two ways to locate the most current Cost Plan in the client record.
A. Using the Filters
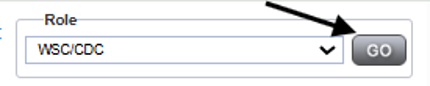
- Log in to iConnect using your assigned role. Click Go.
- Navigate to the client's record utilizing the Quick Search.
- Select the Plans tab.
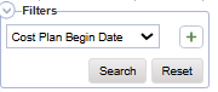
- Navigate to the Filters. Select either Cost Plan Begin Date or Cost Plan End Date.
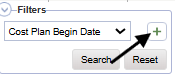
- Click on the green plus sign (+).
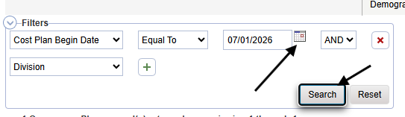
- Check to make sure “Equal To” is in the middle column.
- Enter the date of the Cost Plan that you are searching for. Enter the date as two digits for the month and day (MM/DD) and four digits for the year (YYYY), or use the calendar. Click Search to review the results.
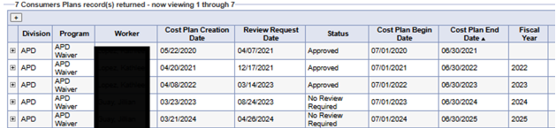
- Your results will appear below.
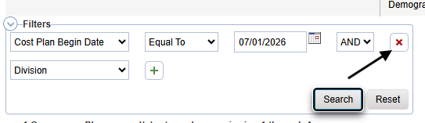
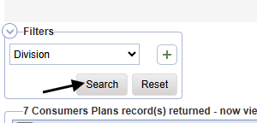
- If wanting to view without filters, follow the steps below:
- Click on the red (X)
- Click Search to review the results without the filter



A. Using the Headings
- Log in to iConnect using your assigned role.
- Navigate to the client’s record utilizing the Quick Search.
- Select the Plans tab.
- The list view grid will appear with all the client’s Cost Plans.
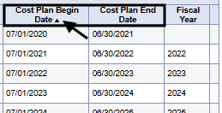
- Locate the header “Cost Plan Begin Date” or “Cost Plan End Date”. Clicking the box changes the sort order of the Cost Plan to ascending or descending. The order will be indicated by the arrow


If your region currently does not have a Provider Trainer, you can email iConnect@apdcares.org or contact another region’s trainer with iConnect-related questions.